There is one Risk Register per Project that uses the RC Matrix selected for use within the Project. The Risk Register is a live document and should be utilised to track content for the duration of the Project. The headings used on the Worksheet are designed to capture and explain all actions related to the content. The Area / Function & Sub-Area columns populate from Keyword input. Priority risks can be selected to show on the Risk Register Tab and the Project Dashboard.
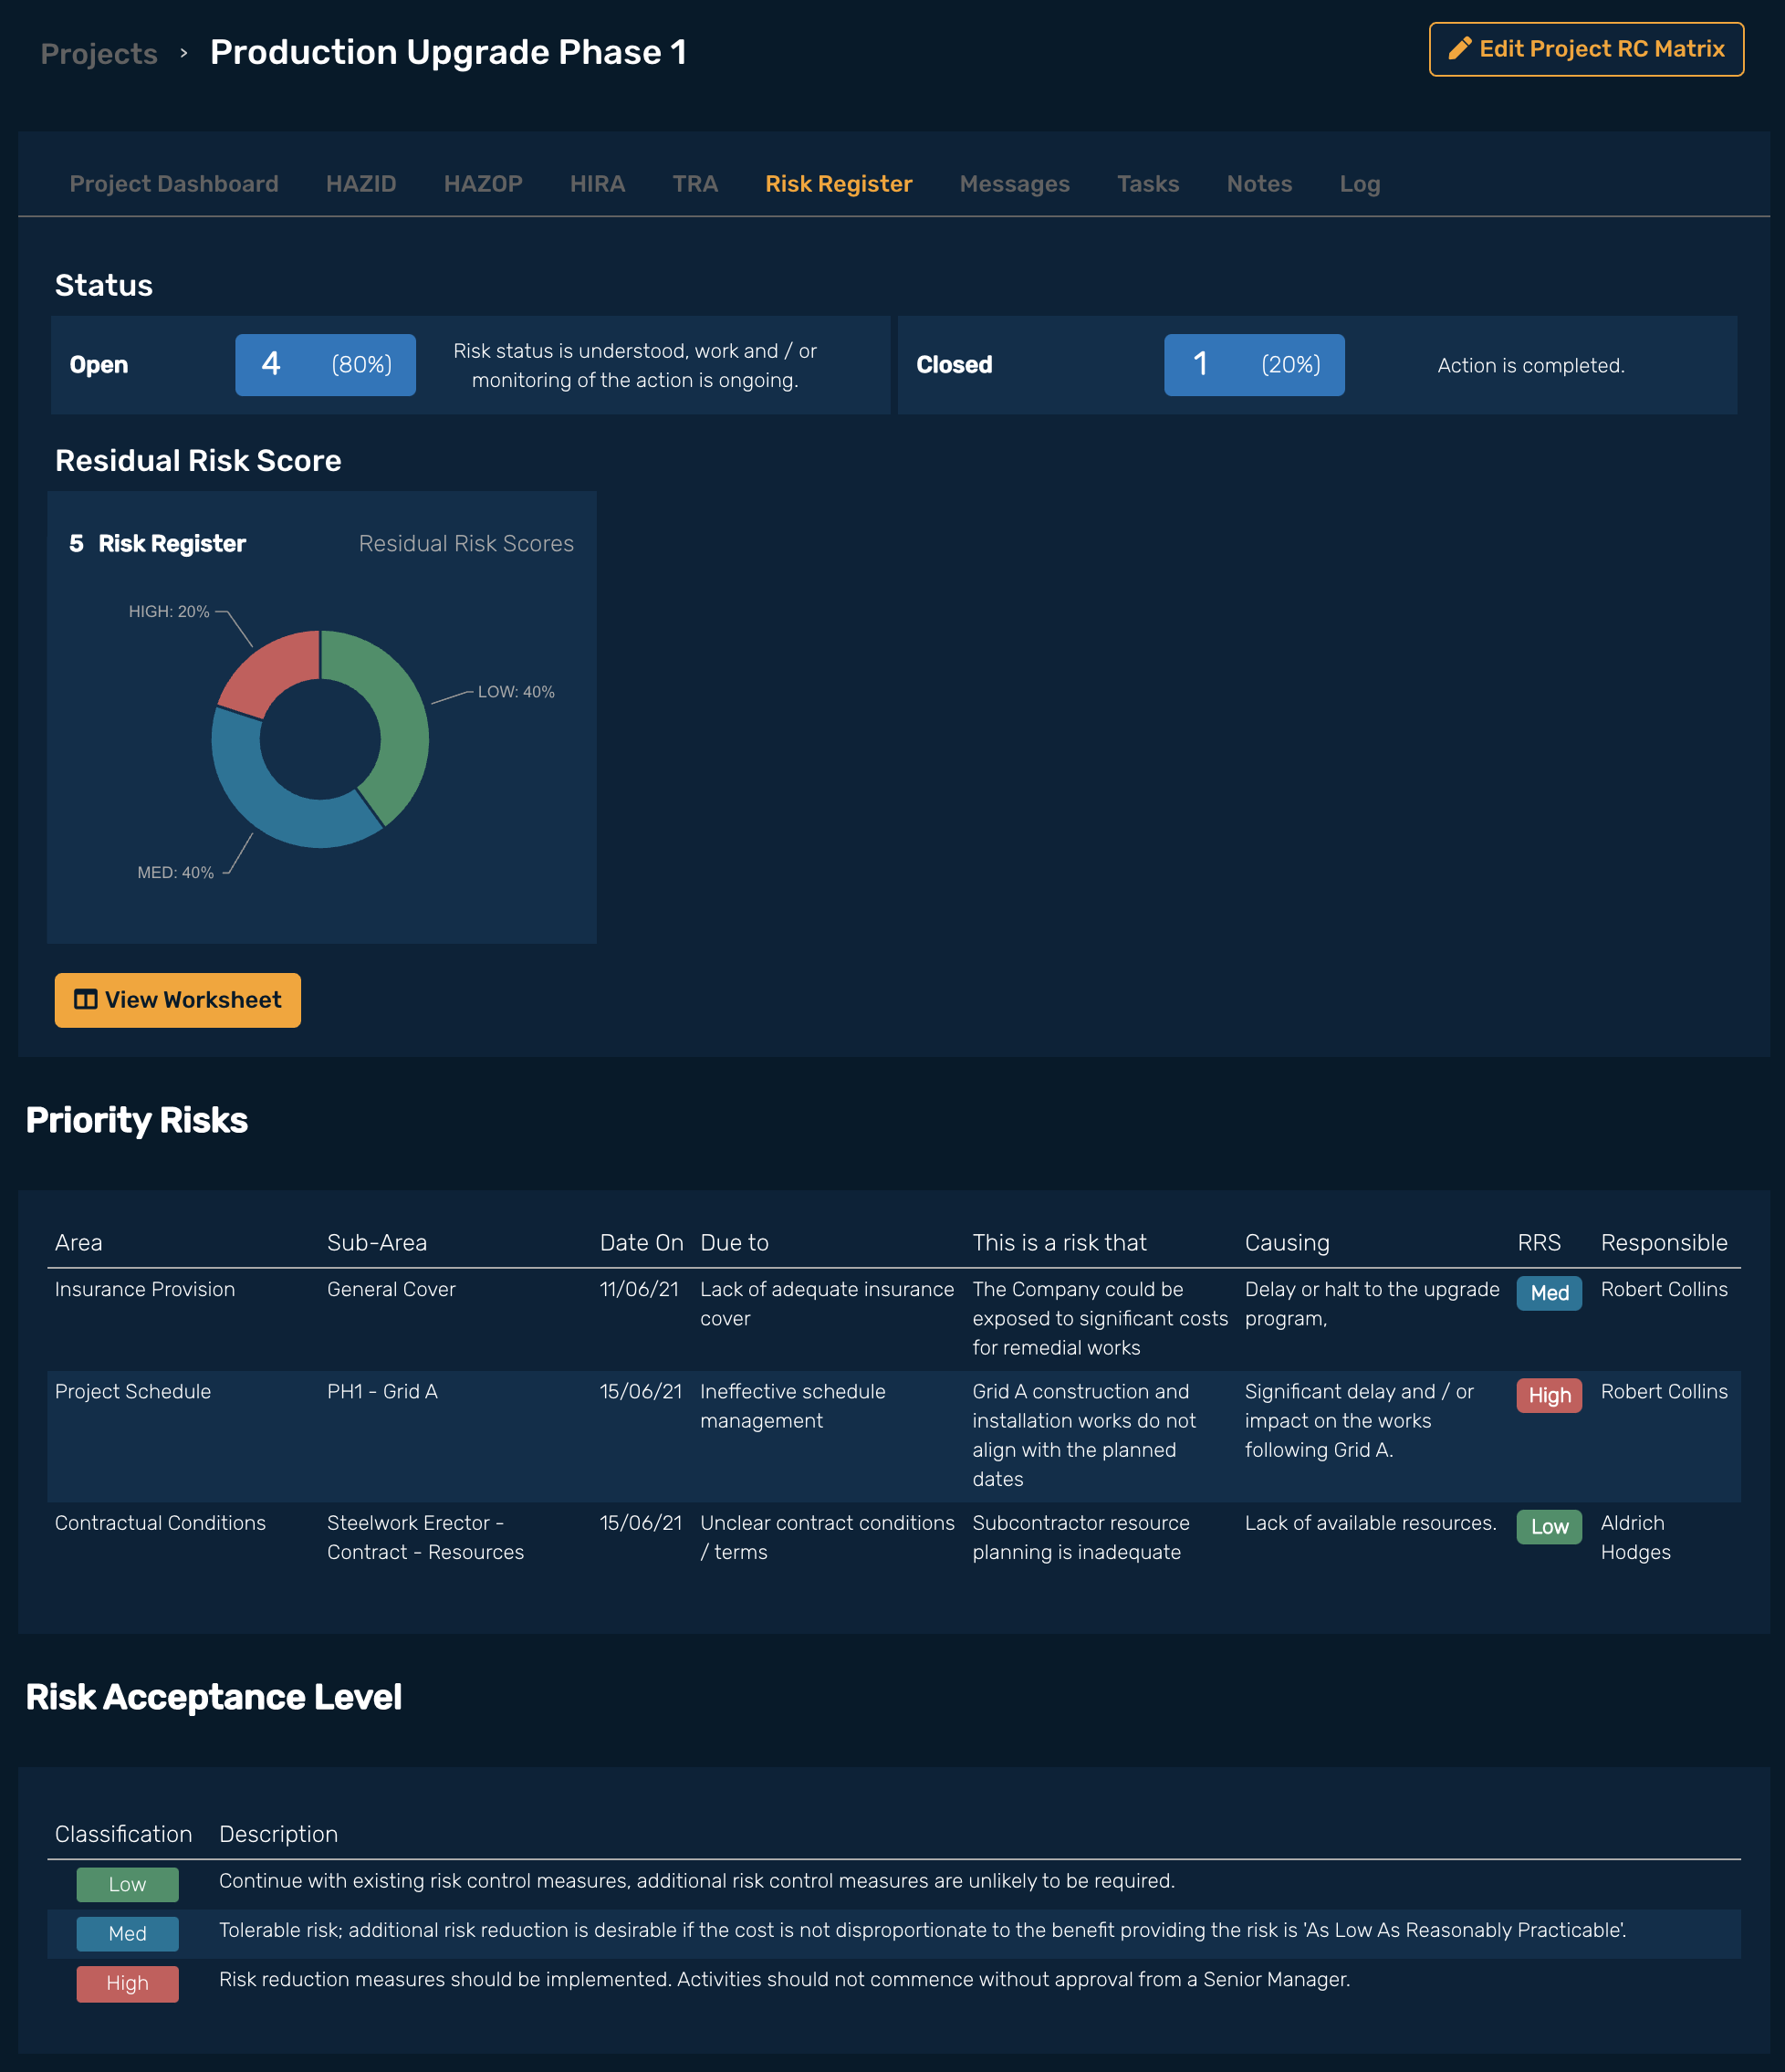
Status provides a numerical and % summary of the Status [Open / Closed] for all Risk Register rows within the Project.
The donut chart provides a graphical % view of the RRS [Residual Risk Score] from all Risk Register row content within the Project.
Risk Register content that is important to the User can be selected and highlighted as a Priority Risk. Priority Risks will show on the Risk Register tab and the Project Dashboard. Displayed content columns taken from the Risk Register Worksheet are: Area, Sub Area, Date On, Due to, There is a risk that, Causing, RRS & Responsible columns.
The Risk Acceptance Level shows the Classification and Description of the acceptance level, the content is imported from the RC Matrix selected for use within the Project.
Each Project is provided with a Risk Register. The Risk Register is a live working document, it is not assigned a document number. Clicking the ‘View Worksheet’ button will take the User to the Risk Register Worksheet.
The RC Matrix used in the Project can be edited. Changes made will be applied to HIRA and TRA Worksheets.
Click ‘Add row’.
See also RAM Worksheet Filtering - Adding Rows.
RISKUL generated sequential number for each entered row.
To select / de-select Risk Register content and highlight it as a Priority Risk select the tick box next to the ‘Id’ column on the Risk Register Worksheet, a tick mark will show indicating that the risk has been identified as a Priority Risk. There is no limit to the amount of Priority Risks selected however to enable an effective process to manage the identified content organisations should decide on a maximum number. Priority Risks can only be selected from ‘Open’ content. Content which is closed will result in the Priority Risk automatically de-selecting.
Selecting the Area / Function column on an activity row will present the Area / Function Keywords listing. Only one Area / Function Keyword can be selected. Once chosen the column will populate with the selection.
See Adding Keywords - Risk Register.
Selecting the Sub-Area column on an activity row will present the Sub-Area Keywords that have been included as a Sub-Area associated to the Area / Function. Multiple Sub-Area Keywords can be selected however it is recommended to only select one.. Once chosen the column will populate with the selection. A Sub-Area can not be selected if an Area has not been selected. The Sub-Area field can be left empty if required.
See Adding Keywords - Risk Register.
The name of the person who is adding the content.
Date On will auto populate with the date the row was added. The date can be edited.
Free text area; this should be used to detail the content that is being added e.g. ‘Poor understanding of X’
Free text area; this should be used to detail the risk that is being documented [following on from ‘Due To’] e.g. ‘Personnel working on Y’
Free text area; this should be used to detail the causal effect of the activity [following on from ‘There is a risk that’] e.g. ‘Could be exposed to Z’
CQ [consequence] will show the Consequence definitions defined when configuring the RC Matrix for the Project. The pop-up shows the consequence level from the RC Matrix enabling a selection to be made for the CQ column when viewing the RC Matrix definitions. The CQ is re-evaluated after the Mitigation has been inputted to provide a RRS for the task.
PR [probability] will show the probability definitions defined when configuring the RC Matrix for the Project. The pop-up shows the probability level from the RC Matrix enabling a selection to be made for the PR column when viewing the RC Matrix definitions. The PR is re-evaluated after the Mitigation has been inputted to provide a RRS for the task.
Selecting At Risk will display the selection entered into the chosen RC Matrix Assessment Category. Click ‘use selected’ and the column will populate with the selection.
Free text can be used in the RAM Assessment Categories when using the worksheets.. Enter the text in the ‘Add At Risk’ field and click Use Selected. This enables the user to be specific with the At Risk content if required for a worksheet / row entry. Free text inputted is NOT saved within the Assessment Category drop down and will only display on the row in which is has been entered.
Content added should still relate to the main assessment categories ie. If ‘Personnel’ is a main 'Assessment Category’ then the free text used to provide more detail could be ‘Site Operative’.
RISKUL will assign a Risk Score taken from the RC Matrix. The RS and RRS columns will default to Low, Medium, High and the prerequisite colour for each.
Mitigation is a free text box. The User can specify the mitigation to be applied to reduce the RS and allow for an estimation of the RRS. The text box can be expanded by dragging the right hand corner of the box to the right and down. The area will auto-size to allow for the full text entry to be shown on the worksheet.
The name of the person responsible for implementing the mitigation.
The name of the person responsible for verifying that the mitigation has been implemented.
Free text box that can be used to add any additional detail to the row content.
Select Status of the task. Marking the task as ‘Closed’ will auto-populate the ‘Close date’ column with the current date, the date can be edited if required. If the task has also been selected as a ‘Priority Risk’ it will be de-selected once the task is closed. Changing the status back to ‘Open’ will clear the ‘Close Date’ column.
Free text box that can be used to state how / where the content has been closed. e.g. ‘Section added to procedure XYZ’
Insert the close out date for the action; the date format is required as DD/MM/YYYY. NOTE: If the task is makred as 'Closed' the 'Close Date' will auto-populate, the date can be changed if required.
Filters are provided on the Risk Register Worksheet to enable the User to select specific task parameters. See RAM Worksheet Filtering. Filtering the Worksheet by the Area / Function column will automatically select the Sub-Areas that have been linked to the Area / Function.